- From the Home Menu, navigate to Template> Manage Contract Template> All Template> Create New Template.
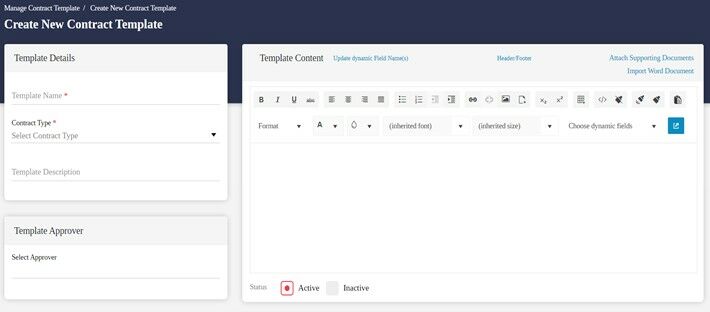
- The Create New Contract Template page will load. (see image below)
Reminder: All required fields (*) must be populated.
- Once the page loads, complete the following information for each section:
- Template Details
|
Template Name* |
Enter the name of the Template. |
|
Contract Type* |
Select the Contract Type. Click to the arrows to expand or collapse each section. Choose one from the list. |
|
Template Description |
Enter a unique description to identify the template. |
- Template Approver
|
Select Approver |
Enter the Approver’s Name. If the Approver is already setup in the system, the user can type in the first letters of the Approver’s name and a list will initiate for potential match.
Note: If there’s no match, a “No Data Found” message will display. |
- Template Content
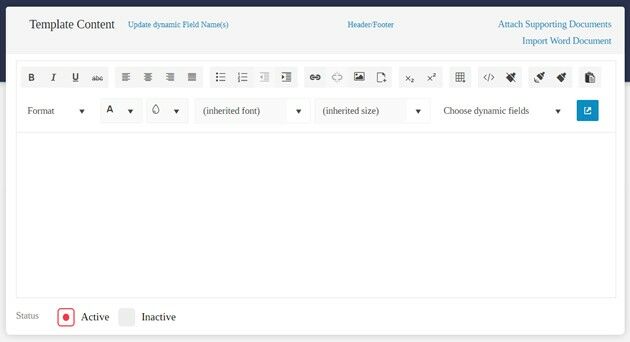
In this section, users can generate a personalized template format that can be used repeatedly as a base format for contracts or other documents. Depending on permissions, users can customize the content of a contract, use Dynamic Fields, and attach a file or a document.
Creating a standard Template ensures that any customizations made in the template are not modified or overridden. A draft version of the Template can be created, users can also copy and paste the contract content using the Content Editor features.
-
- Content Editor
Button Controls and Pull-Down Lists features are available at the top of the template like a typical office product. (shown below). Users’ need to use their mouse to hover on the template’s Buttons Controls to identify each one.
-
- Template Status
Select the status of the Template:
- Active – default setting for setting up a new Template.
- Inactive – select if the Template is no longer or not yet active.
Setup Dynamic Field(s)
Dynamic Fields can be created and edited in the Template. These are changeable fields within a standard template that can be modified or updated without changing the format or the context of the template.
To add a Dynamic Field:
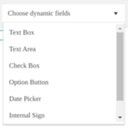
- In the Template, go to the Choose Dynamic Fields dropdown
- From the list, scroll down and select the format.
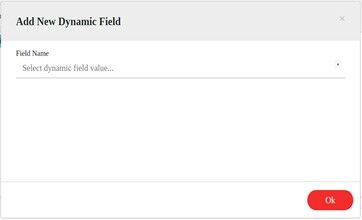
- On the next screen, add a Dynamic Field Name that will be used constantly.
- Click the Ok button.
- Verify that the new Dynamic Field setup showed up on the Template.
To update a Dynamic Field Name:
- From the Manage Contract Template list, select the Template that needs to be updated.
- On the Action column, click the pencil icon to initiate the edit process.
- From the template content section, select the Dynamic Field Name that needs to be modified.
Note: A user must select a Dynamic Field Name first to start this process, otherwise the system will display a message asking the user to select the Dynamic Field that needs to be updated.
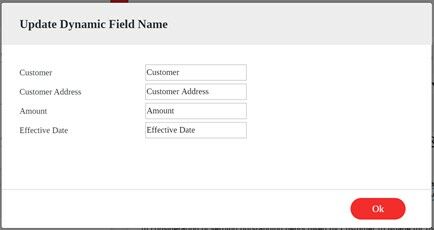
- Once selected, the “Update Dynamic Field Name(s)” page will display.
- Modify the field with the correct information.
- Once completed, click the Ok button.
Attach Supporting Documents
Supporting documents for a Contract Template can be uploaded and attached to provide backup information. Users can use this feature if there is a need to affix any additional documents that are relevant to the Contract.
To Attach a Supporting Document in a Contract Template:
- In the Template, click the “Attached Supporting Documents” link to initiate the process.
- On the next page (see image below), perform the following:
Reminder: All required fields (*) must be populated.
- Exit the page when the process is complete.
- Import Word Document
Users can use this feature to import a word document that was generated outside of the system. Once the document is imported, users can use the Content Editor’s features to add to the format and customized the Contract Template accordingly.
To initiate Import of a Word Document to a Contract Template:
- Navigate to Template> Manage Contract Template> Create New Template.
- Click the “Create New Template” to initiate the process.
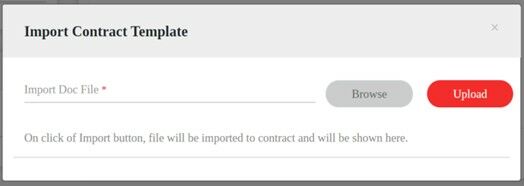
- On the Template Page, go to the Template Content section and locate the Import Word Document link, access the link.
- On the next page (see image below), perform the following:
- Exit the page once the process is complete.
- Add Metadata Field
Users can create and include Metadata Field in the content of the contract template. Metadata is a set of data often used to provide information to identify other data. Depending on permissions, Users can also edit and provide a value for the Metadata Field.
To Add/Delete a Metadata Field to a Contract Template:
- In the Template, navigate to the “Add Metadata Field” section.
Notes:
- By default, the system is already set up for users to populate information for the first Metadata field.
- Choose to click the Add New Metadata button or the + sign by the Field Description to add.
- Users can add multiple Metadata required for the Contract Template.
- Once the Metadata is setup on a new Template, the x sign becomes visible to cancel or remove the setup.
- Setup the following information:
|
Field Name |
Click the to show the list. Select a Field Name from the list. |
|
Field Type |
Click the to show the list. Select a Field Type from the list. |
|
Field Description |
Enter a description for the field. |
- Setting a Workflow
A Workflow can be attached to a Contract Template to follow a sequence of fixed tasks or automated steps. This process ensures proper completion of specific contracts or documents that are being transferred from one step to another. Predefined rules setup in the workflow, ensure that the required contract template or document progress from one contributor to another without any setbacks or impediments. Users may select or choose from the predefined workflows in the system.
Selecting an existing Workflow for a Contract Template:
- Navigate to the “Set Workflow” section.
- Select the Action from the list. Click the to see the list of workflows.
- Send for Review as Word/PDF
- Approver
- Internal E-Sign
- Recipient E-Sign
- Users can attach more than one workflow needed for Template Setup.
Notes:
- An Action from the list must be selected to add another workflow.
- If the user clicks the + sign prior to selecting an Action, the system will display a warning
- Enter a Description for the action, this information is required.
- Audit Trail & Versions of Contract Template
In Anapact, users can track the activities and versions of the Contract Template. This feature is an essential tool to help manage the template’s activities, status, including any execution issues on movements.
The system’s Audit Trail provides a relevant chronological record of the sequence of events, actions, destination, and current status of each Contract Template that was generated in the system. The system routinely produces a list of progression that may be crucial to the operational integrity of a company.
To view the Audit Trail:
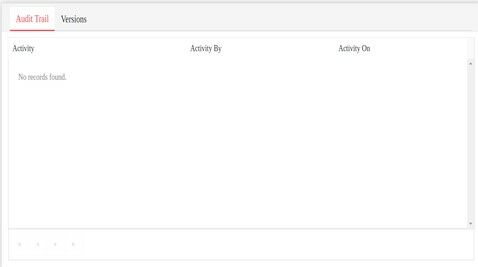
- Navigate to the “Audit Trail” section of the Contract Template.
- Select the Audit Trail Tab to view the sequence of activities and progressions of the Template.
- Select the Versions Tab to view the current Contract Template version and Links.
- Saving the Contract Template
Anapact provides other options prior to submitting the final template:
|
Discard |
Choose this option to dispose or reject the current Template. |
|
Preview |
Choose this option to see a preview of the Template |
|
Save as Draft |
Choose this option to save the preliminary version of the Template. This option allows the Template to be visible on the Dashboard. Users can later select to continue working on the template. |
|
Submit |
Choose this option to save and submit the configured Template. |
Notes:
- Once the user chooses to “Submit” the Contract Template, the Workflow(s) associated to approve the Template will start to initiate.
The Contract Template will change to its new status on the Dashboard.

